Designing Your Thrillify Event
Your fun begins Backstage! Set up challenges, schedule activities, and monitor your event all from the web-based Backstage Dashboard. It's free to use and easy to get started!
Players should check this out to learn how to participate in your event.
Step 1
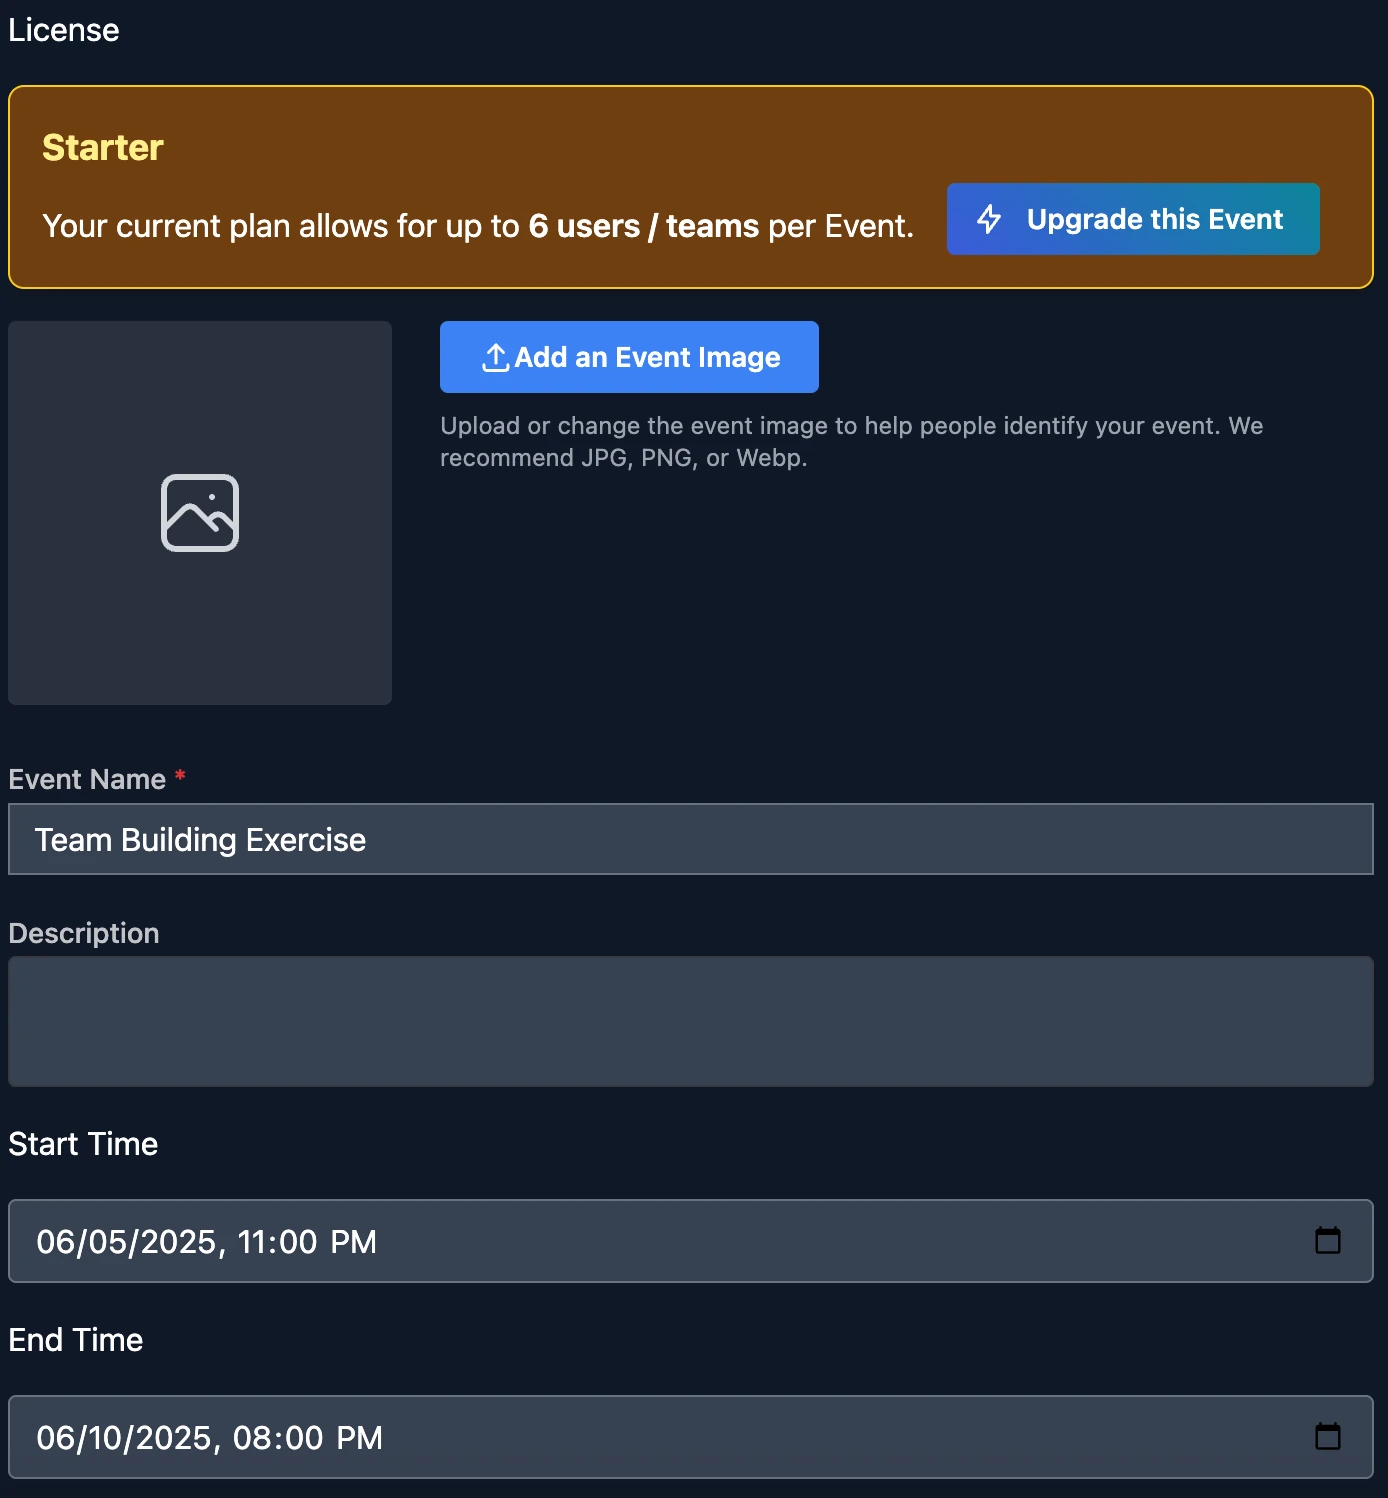
Create Your Event
Log in to Thrillify Backstage for free and create your first event. Give it a name, add an event picture, and set the start and end times. Set a unique join code to give to your participants so that they can join your event from the App once it starts.
Step 2
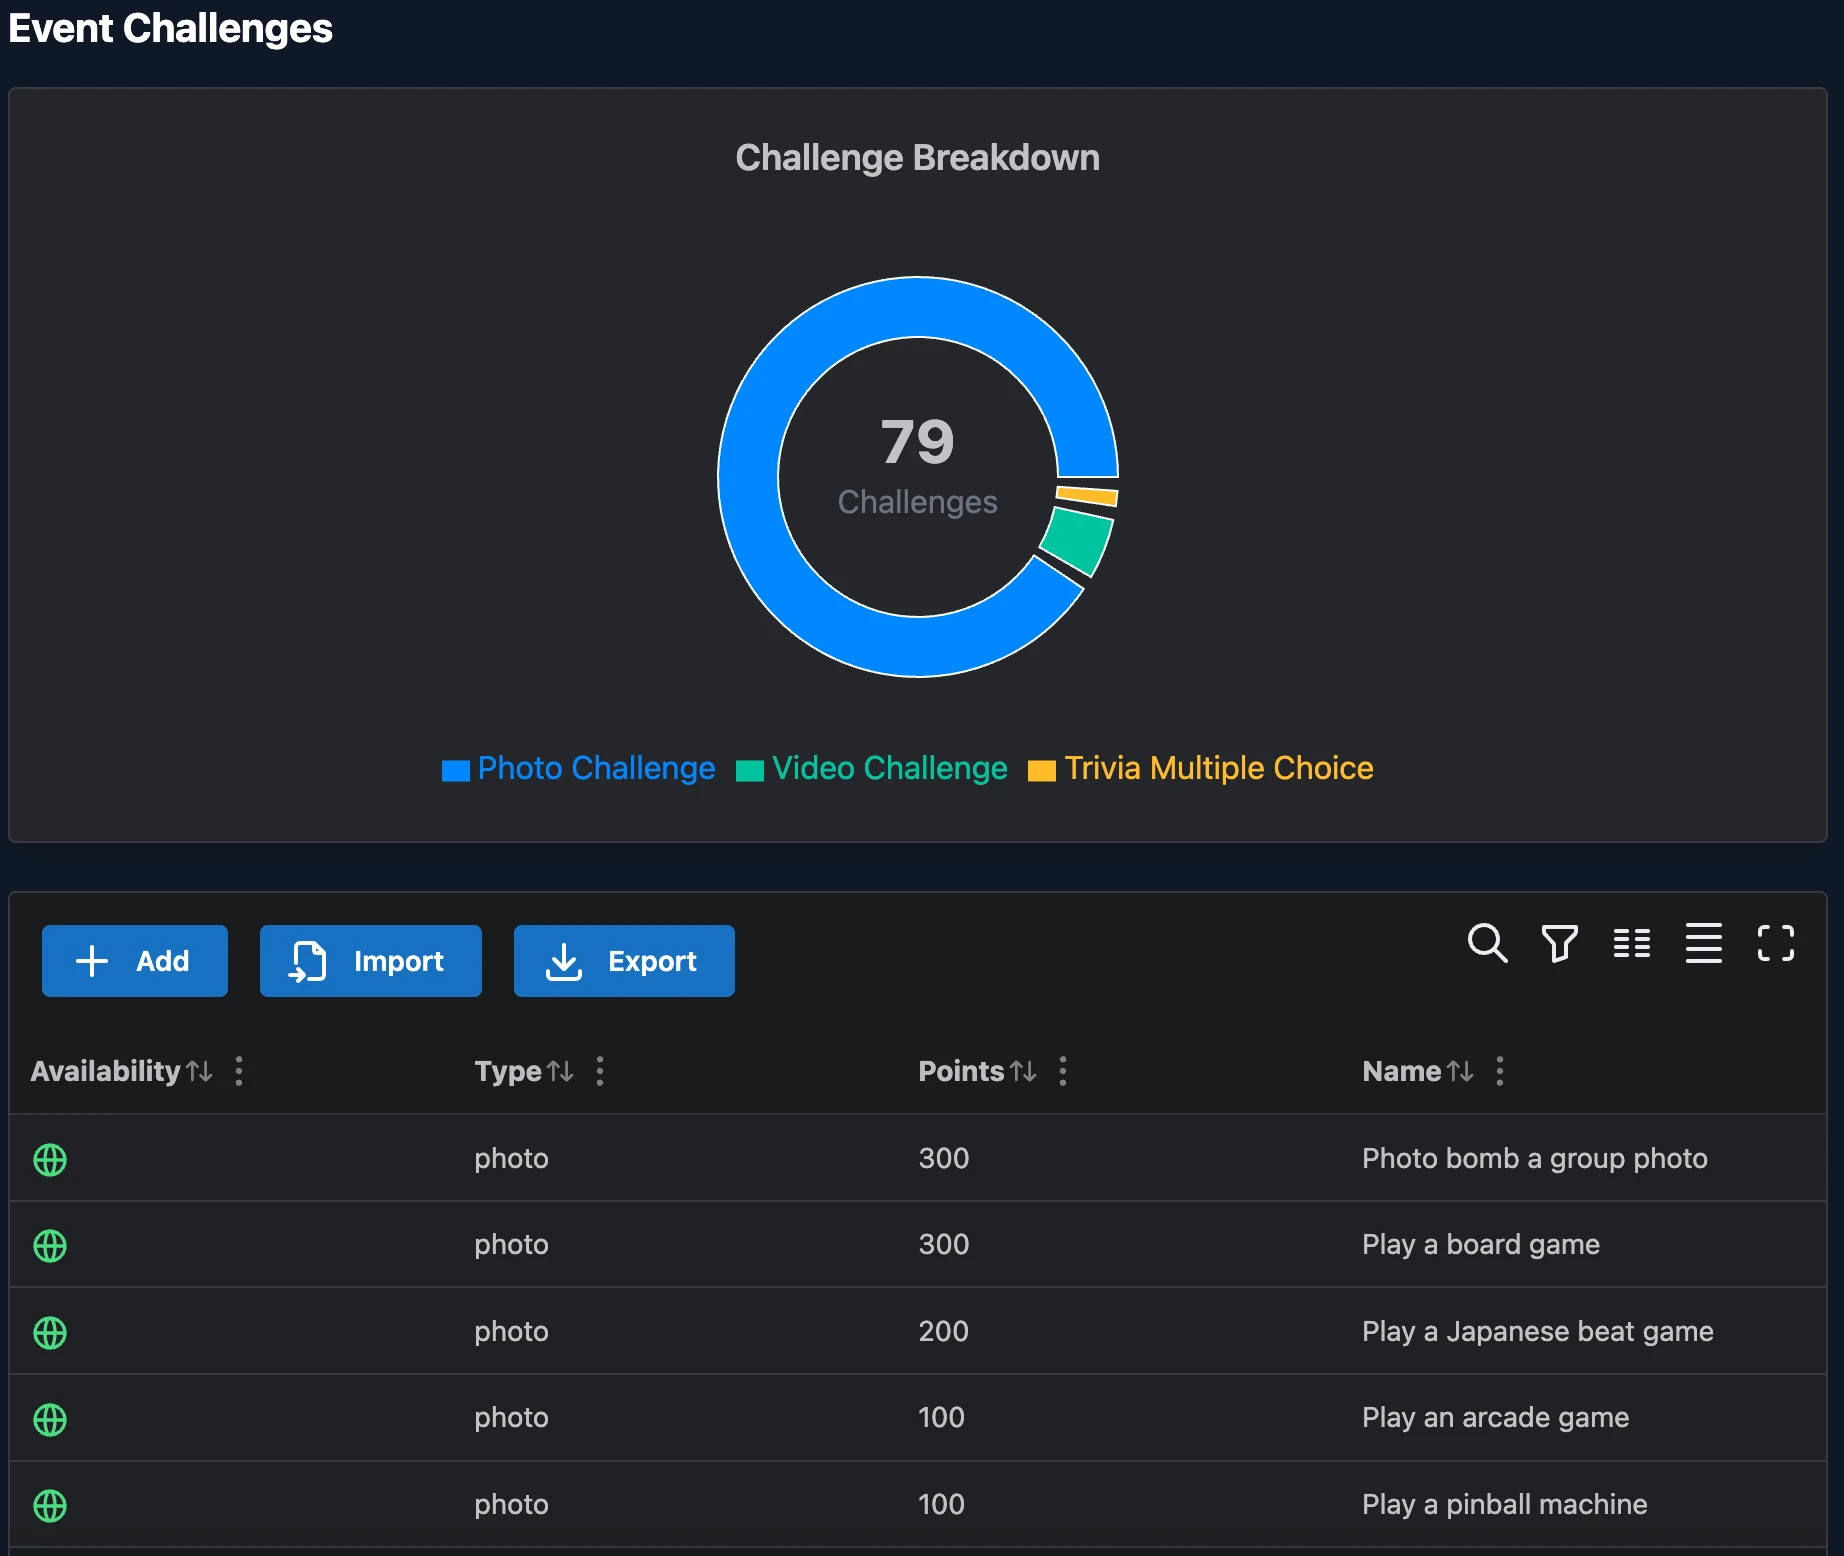
Add Challenges
Every Event needs Challenges! These are the tasks that participants will complete to earn points. Add as many Challenges as you like, and set the points for each one. Create photo or video Challenges to have participants submit content, or create trivia Challenges to have them answer questions or complete surveys. GPS or Location Challenges are also a great way to get participants exploring! Don't want to bother with creating the challenges yourself? No problem! You can use Thrillify AI to create custom Challenges for you in seconds!
Step 3
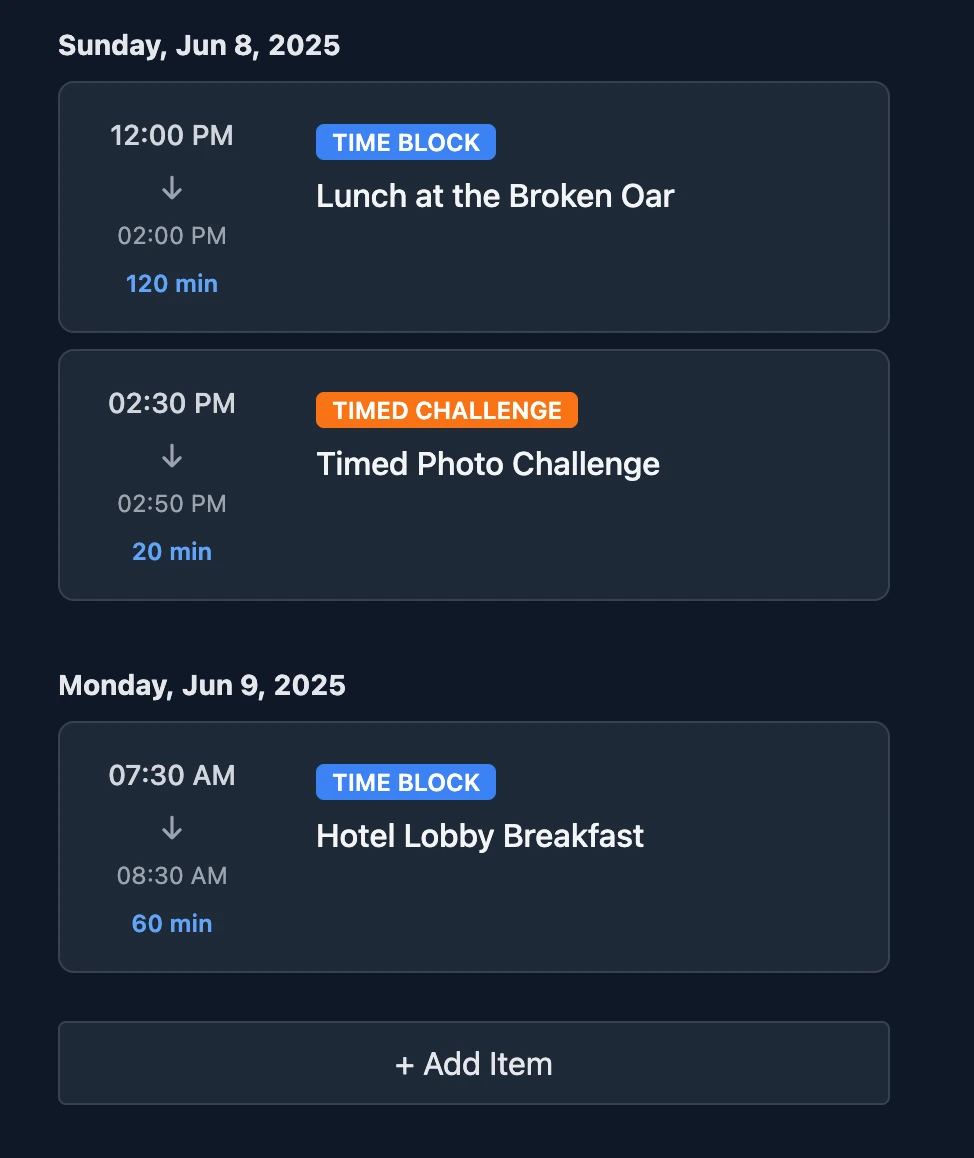
Optionally Set Up A Schedule
You can optionally set up a schedule for your event. Schedules let you block out time slots for specific Challenges, or just to let participants know when certain activities are happening. Participants will see the next scheduled activity in the App and will get a notification when it starts. Add challenges to a time slot to create timed Challenges that participants can only complete during that time.
Step 4
Start Playing!
Once your event starts, participants will join the event from the Thrillify App using the unique join code you set up. They can then complete Challenges, submit content, and earn points. You can add or remove Challenges during the event if you would like, or you can walk away and let the event run itself. Use the Thrillify Backstage web portal to track engagement statistics, view and download submitted content, and see how participants are doing both during and after the event!
