Create an Event
Creating a high-energy, challenge-packed event in Thrillify is quick and easy. Follow these steps to build your own unforgettable adventure!
1. Log in or Create a Thrillify Account
Head to https://backstage.thrillify.com on your desktop browser.
Log in with your existing account or create a new one in just a few clicks.
INFO
Events can only be created in the web-based Thrillify Backstage — the mobile app is for participating in events only.
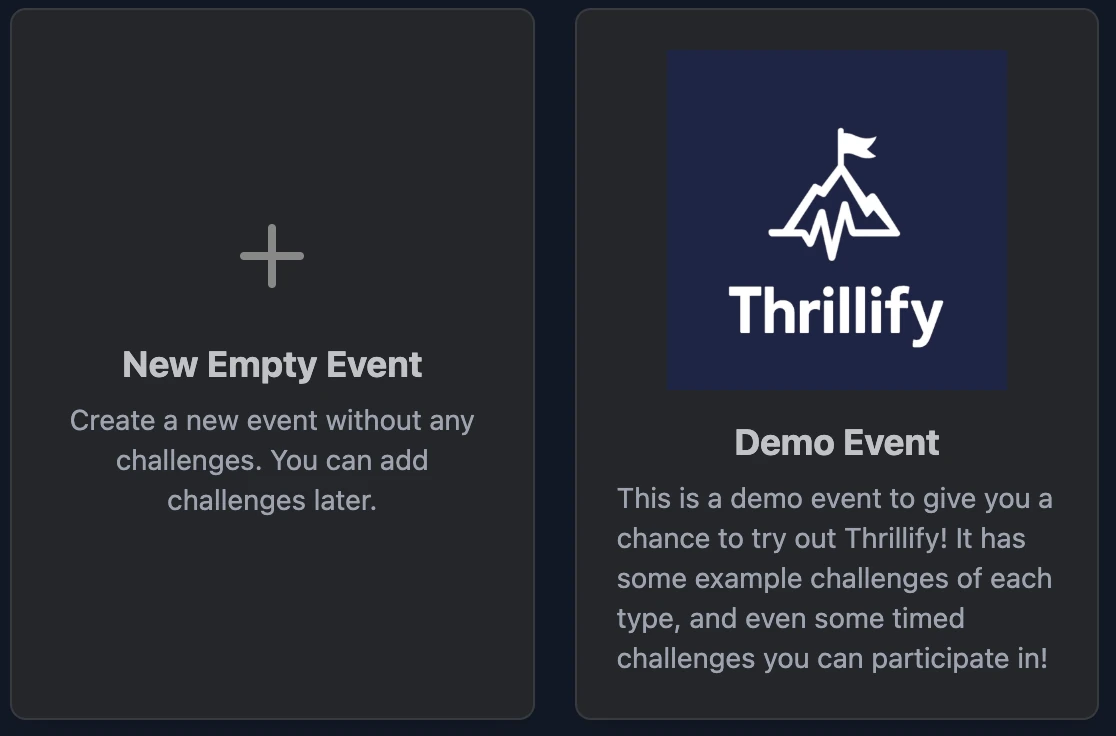
2. Choose to Create a New Event
When you first log in, you’ll be given the choice to start from scratch with a blank event or use a pre-filled demo template. Pick whichever option suits your needs best.
3. Upload an Event Image
The event image is the first thing participants see when they join your event in the app. It helps set the tone and vibe, and makes it easier for players to recognize and remember your event.

TIP
You can skip this and update the image later if inspiration strikes!
4. Give Your Event a Name
Pick something memorable and unique. This is how participants will identify your event inside the Thrillify app.
5. Write a Short Description
Use this field to:
- Explain the theme or purpose of your event
- Outline any special rules or restrictions
- Hype up your participants!
Make it fun and clear — this is your event’s first impression.
6. Set a Timezone
The timezone you choose is especially important if you’re setting up an event schedule. It determines when timed challenges start, when scheduled breaks or blocks occur, and when participants should be notified. It also controls when the daily leaderboard resets—so make sure it’s set correctly! You should set this to the Timezone where the Event will primarily be taking place.
7. Set the Start and End times for the Event
Your event will automatically begin at the Start Time you set here — that’s when participants can start joining through the app. The End Time controls when the event wraps up: new players won’t be able to join, challenges can no longer be submitted, and the final scores will be locked in to determine the winner. Make sure your timing is spot-on!
CAUTION
Be sure to set your event’s start time in the future if you don’t want it to begin right away. Once the event starts, certain details — like the start time and timezone — become locked and can’t be changed. Plan ahead!
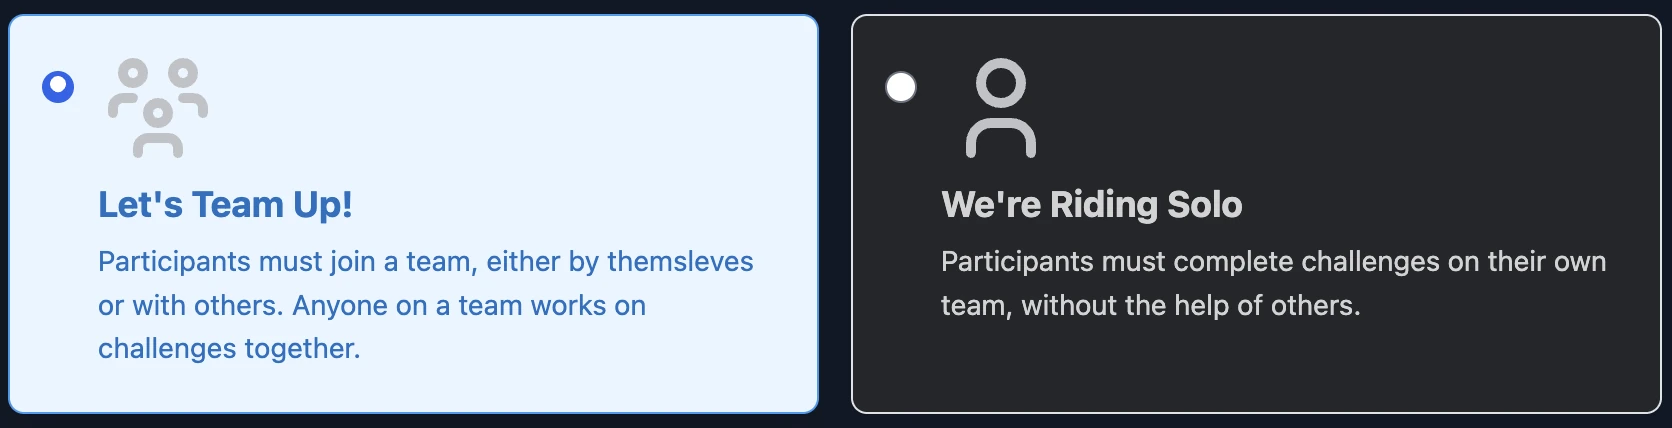
8. Choose if players can team up or must play solo
Players can participate solo or as part of a team. When teaming is enabled, players work together to complete challenges and earn points collectively. As the event organizer, you can decide whether players are allowed to create their own teams or if you’ll assign them yourself. Every team can optionally have a join code that players will need to join the team. You’ll also need to set the maximum team size, which limits how many players can be in a single team.
9. Click Save — You’re Done!
Click the Save button to lock in your details.
You can always come back later to tweak your event as needed.
Nice! Now you’re ready to create some challenges.