
Create a schedule with timed challenges and unlocks
Thrillify lets you optionally build out a detailed schedule for your event. The start and end times for the Event will always appear on your schedule automatically. But you can also add timed challenges, scheduled challenge unlocks, and activity blocks.
Timed challenges are only available during specific windows and must be completed within a limited timeframe. Scheduled challenge unlocks reveal one or more challenges at a specific time, then keep them visible for the rest of the Event. Time blocks are helpful for highlighting key moments in your event — like lunch, meetings, or special activities. Players will receive notification reminders for all timeline entries to help keep them on track and in the action.
Creating a schedule isn’t required, but it’s a great way to add structure and excitement to your event. It helps keep things organized and can make the overall experience more engaging for participants.
Here’s how to create and manage a schedule for your event.
1. Open the Schedule Tab
From your event dashboard, ensure you are in the Edit view (use the View / Edit switch in the left nav if needed) and click on Schedule in the left-hand sidebar to begin managing your event timeline.
2. View and Manage Your Timeline
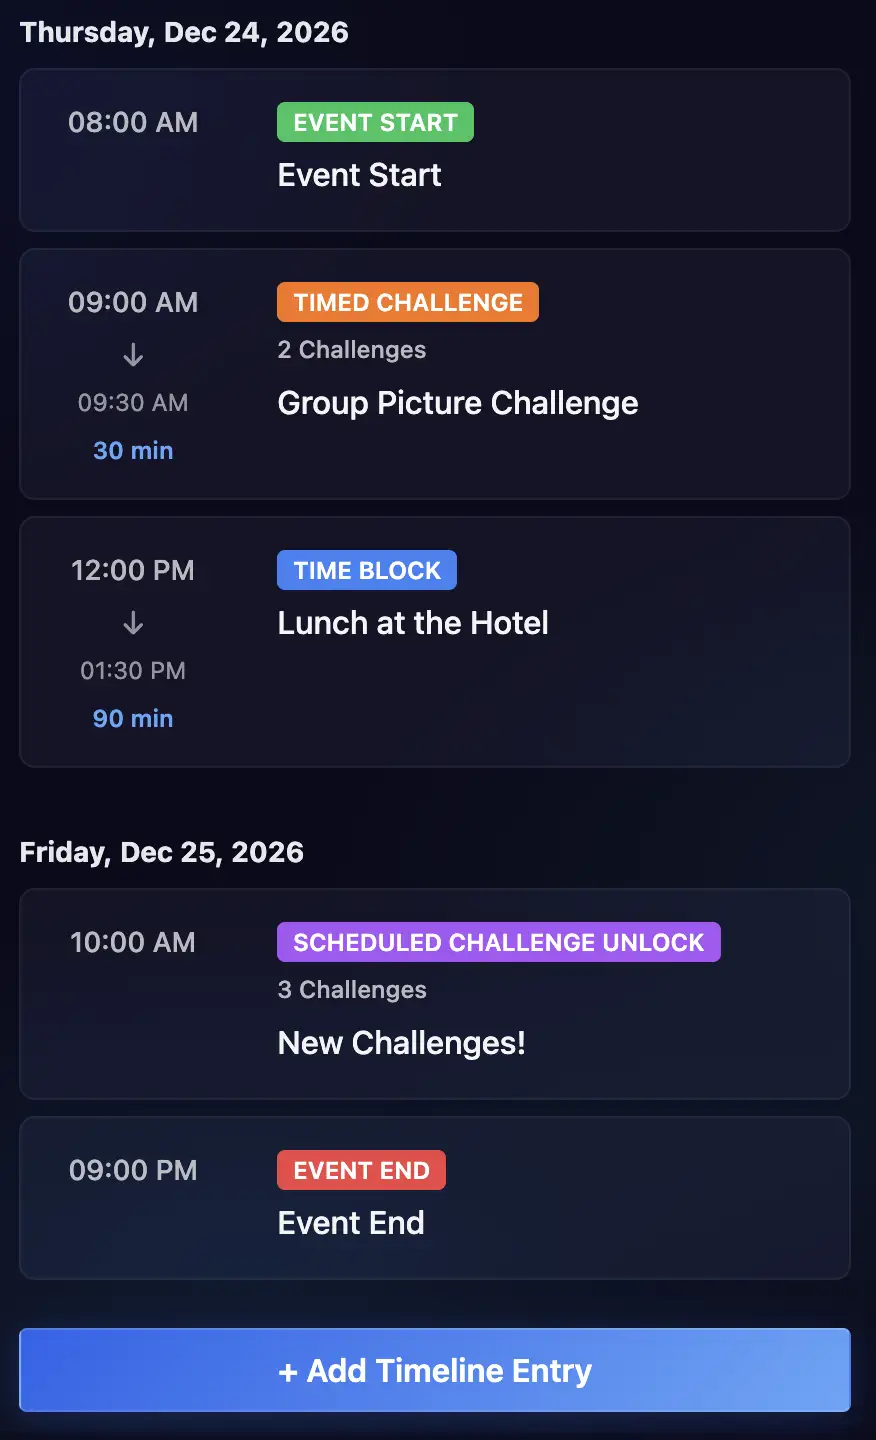
Once added, your schedule will visually display each item in chronological order:
- Each item shows the start time, type label, and title.
- Duration appears for timeline entries that use duration.
- Timed challenges display in orange, scheduled challenge unlocks in purple, time blocks in blue, and start/end markers in green/red.
- Click on an item to edit or delete it.
3. Add a New Timeline Entry
Click the + Add Timeline Entry button at the bottom of the schedule or the Plus button on the bottom right to begin creating a new entry.

You’ll be prompted to fill out the following details:
Schedule Item Details
- Type: Choose between
Timed Challenge,Scheduled Challenge Unlock, orTime Block. - Scheduled Start Time: Set the exact time you want this item to begin. This is based on your Event’s configured timezone. There can only be one timeline entry during any given time period.
- Duration (minutes): Used by
Timed ChallengeandTime Blockentries. Scheduled challenge unlocks do not use duration. - Name: Enter a clear title for the item (e.g., “Group Picture Challenge”).
- Description: Optionally describe the item. This helps participants know what to expect.
- Event Challenges (for challenge-based entries): Select one or more previously created challenges to include. You can rearrange or remove them as needed.
Behavior by type:
- Timed Challenge: Challenges unlock at start time, must be completed in order, and relock when the timed window ends.
- Scheduled Challenge Unlock: All selected challenges unlock at start time, there is no timed window, and they remain unlocked for the rest of the Event.
- Time Block: A simple block of time to highlight a key moment in your event. Players will receive notifications for all timeline entries.
TIP
The order of challenges in a time block applies to Timed Challenge entries only. Scheduled Challenge Unlock entries reveal all selected challenges at once when the unlock time is reached.
Click Save to add the item to your event schedule.
Tips
- Use Time Blocks to schedule breaks, meals, or meetups that aren’t tied to scoring. Players will receive notifications about all timeline entries.
- Use Timed Challenge entries when you want urgency and sequential completion.
- Use Scheduled Challenge Unlock entries when you want to reveal challenges at specific moments for the rest of the event.
- For detailed walkthroughs, see How do I create a challenge that can only be completed within a specific timeframe? and How do I unlock or make challenges visible at a specific time?.
That’s it! Your event is now structured and ready to go. Now you’re ready to invite users.